If you've worked with Oracle Cloud Infrastructure (OCI) for any length of time, you've probably clicked through the console to spin up a Compute instance, a VCN, or a load balancer at least once. It works fine — until you need to do it again for a second environment, or a teammate needs to reproduce your exact setup, or you need to tear everything down and rebuild it in a hurry. That's where Terraform earns its keep.
Terraform is the most widely adopted Infrastructure as Code (IaC) tool, and it plays very well with OCI. Instead of manually clicking through the console, you describe the infrastructure you want in configuration files, and Terraform figures out how to make that a reality — creating, updating, or deleting resources as needed.
This guide walks through the three commands you'll type more than any others in a Terraform workflow — terraform init, terraform plan, and terraform apply — and shows how they fit together when managing OCI resources.
What Terraform Actually Does on OCI
Terraform uses its own configuration language, HCL (HashiCorp Configuration Language), to describe infrastructure declaratively. You're not writing a script that says "do this, then this" — you're writing a description of the end state you want, and Terraform works out the steps to get there.
Here's a simple example of an OCI Compute instance defined in a .tf file:
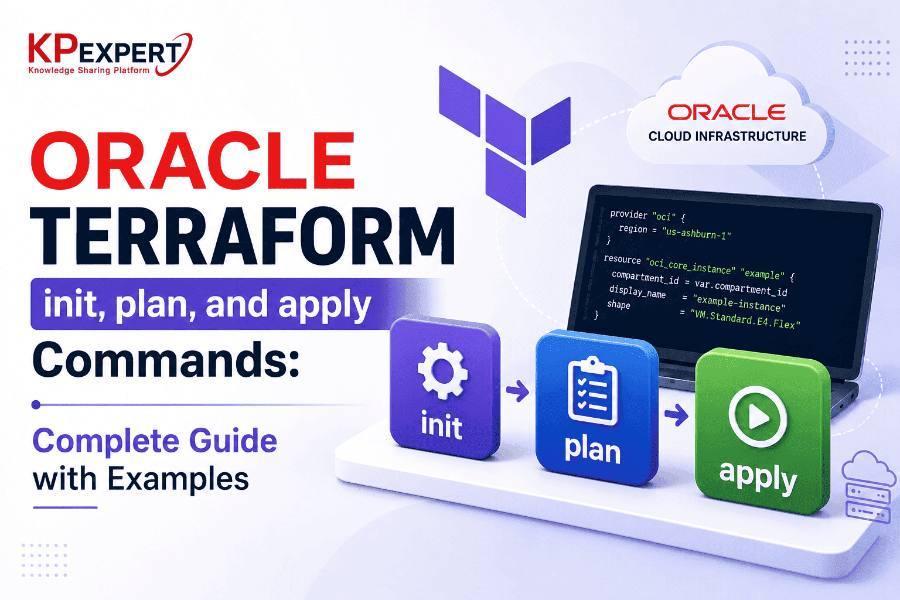
Terraform reads this, checks it against what currently exists in your OCI tenancy, and determines what needs to change. That comparison-and-execution cycle is the heart of the whole tool, and it maps neatly onto three commands:
Before You Start: Prerequisites
A few things need to be in place before terraform init will do anything useful.
1. Install Terraform
Confirm it's installed and check the version:
2. Set Up OCI Authentication
Terraform needs a way to authenticate against your OCI tenancy. Depending on your setup, this can be done through the OCI CLI configuration file, API keys, instance principals, or resource principals.
For local development, the most common approach is an OCI config file at ~/.oci/config:
3. Set Up a Working Directory
Create a main.tf file inside it — Terraform configuration files use the .tf extension by convention.
Step 1: terraform init
terraform init is almost always the first command you run in a new or freshly cloned Terraform project. It initializes the working directory — downloading the providers your configuration references, setting up any modules, and preparing the backend that will store your state.
Terraform itself doesn't know how to talk to OCI, AWS, Azure, or any other platform out of the box. That's the job of providers. For OCI, you'll declare the provider like this:
Running terraform init downloads this provider and gets the directory ready:
When to Run It Again
init isn't strictly a one-time command. Run it whenever you:
- Start a new Terraform project
- Add or change a provider
- Add or update a module
- Change your backend configuration
- Clone an existing project onto a new machine
Step 2: terraform plan
Once the project is initialized, terraform plan is where you find out what Terraform is about to do — before it does it.
It compares your configuration against the current Terraform state and the actual infrastructure, then prints an execution plan:
The symbols in the output matter, and it's worth knowing them cold:
| Symbol | Meaning |
|---|---|
+ | Resource will be created |
~ | Resource will be modified in place |
- | Resource will be destroyed |
-/+ | Resource will be destroyed and recreated |
That last one — replacement — is the one to watch for. It usually shows up when you change an attribute that can't be updated in place, and it means downtime for that resource unless you've planned around it.
Why This Command Matters More Than It Looks
plan is Terraform's built-in safety net. It lets you review exactly what will happen before anything touches your live environment — which matters a lot more in production than in a sandbox.
For example, if you change an instance shape:
Terraform might determine this requires an in-place update, or in some cases a full replacement. Running plan first tells you which one you're actually facing, so there are no surprises.
Step 3: terraform apply
Once you've reviewed the plan and you're comfortable with it, terraform apply executes it — creating, updating, or deleting OCI resources to match your configuration.
Type yes, and Terraform gets to work:
Init vs. Plan vs. Apply — At a Glance
| Command | Purpose |
|---|---|
terraform init | Prepares the project — installs providers and modules |
terraform plan | Shows what would change, without changing anything |
terraform apply | Actually makes the changes |
A Complete Walkthrough
Here's how the full sequence looks in practice, including a couple of steps that are easy to skip but shouldn't be.
1. Create a project directory
2. Write your configuration
Create main.tf with your provider block and resource definitions.
3. Initialize
4. Validate the configuration
This catches syntax errors and basic misconfigurations before you even get to plan:
5. Format the code
Keeps your .tf files consistently styled:
6. Generate a plan
Read it. Actually read it — this is the step people skip and regret.
7. Apply
Confirm with yes once you're satisfied the plan is correct.
Saving a Plan for Later (Especially in CI/CD)
In production settings, it's common to save the plan to a file and apply that exact plan later, rather than re-planning right before applying:
This matters more than it sounds like it should. Between generating a plan and applying it, the actual state of your infrastructure could shift — someone else on your team could apply a change, or a resource could drift. Applying a saved plan file guarantees you're executing exactly what you reviewed, which is why this pattern shows up constantly in CI/CD pipelines.
A Word on Terraform State
Terraform tracks everything it manages in a state file — by default, a local file named terraform.tfstate. This file is what lets Terraform know the difference between "a resource that doesn't exist yet" and "a resource I'm already managing that just needs a small update."
For solo work or quick experiments, local state is fine. For anything involving a team, it becomes a liability fast — two people applying changes against the same local state file is a recipe for conflicts and corrupted state. In those cases, a remote backend (with locking) is the standard fix, along with a real plan for state backup, security, and access control.
Other Commands Worth Knowing
init, plan, and apply cover deployment, but a few other commands round out the day-to-day workflow:
terraform destroy will remove every resource under Terraform's management in that configuration. It's genuinely useful for tearing down disposable environments, but it has no undo button — treat it with the same caution you'd give a production database drop.Troubleshooting Common Issues
- Provider fails to initialize. Re-run
terraform init, and double-check your provider block and network connectivity — this is often just a connectivity or version-constraint mismatch. - Authentication errors. Almost always traces back to one of: the OCI config file, API key, fingerprint, tenancy OCID, user OCID, or region. Check each in turn.
- "Permission denied" despite successful authentication. This means Terraform can talk to OCI, but the authenticated user or principal doesn't have the IAM policy grants needed for the action it's attempting. Check compartment-level policies before assuming it's a Terraform problem.
- Unexpected destroy/replace operations. This is exactly what
terraform planis for. Never apply changes to production without reading the plan output first, and treat any unplanned-or-/+as a stop sign until you understand why it's there.
Best Practices Worth Adopting Early
- Never skip the plan review. Don't run apply reflexively — read what it's telling you first, every time, even when you're confident.
- Pin provider versions. Use version constraints (
~> 7.0) so a provider update doesn't silently change behavior across your team or environments. - Use variables, not hardcoded values. OCIDs, regions, and compartment IDs belong in variables, not baked into resource blocks.
- Use remote state for any team-based work. Local state doesn't scale past one person.
- Never commit secrets. API keys and private keys should never end up in a Terraform config file or a Git repository.
- Version-control your configuration. Treat
.tffiles like code — track changes in Git so infrastructure changes are reviewable and reversible. - Separate your environments. Development, testing, staging, and production should each have their own configuration, workspace, or module structure — not share state.
Wrapping Up
The three-command rhythm — init, plan, apply — is the backbone of working with Terraform on OCI, and it scales up cleanly once you're comfortable with it. init gets your project ready and pulls in the OCI provider. plan shows you exactly what's about to happen, with no side effects. apply is the only one of the three that actually touches your infrastructure.
A reliable working sequence to build a habit around:
Once this rhythm feels natural, the same workflow extends directly to more advanced OCI resources — VCNs, subnets, Compute instances, Load Balancers, Autonomous Database, OKE, and beyond. The commands don't change; only the resource blocks do.